


 On this page, we present the free “Auto-Towing Mod” add-on for aeroflyRC.
You can find the add-on only on the website www.aerofly-sim.de
1. Installation
First, download the ZIP file and move it to the aeroflyRC user folder. To do this, be sure to save the ZIP file correctly in …/Documents/aeroflyRC10/aircraft_mod.
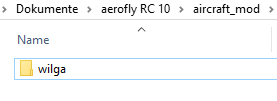 Now right-click the ZIP file and select the “Extract here” option. The two folders “Wilga” and “Beaver” must be saved in the “aircraft_mod” folder.
On most Windows PCs, the ZIP utility is already available. The finished installation should now look like the image on the right.
The only thing you should check again in aeroflyRC is the cable length, which should be set to the default value of “20 m.” The settings are made directly in aeroflyRC under “Settings” and “Simulation.”
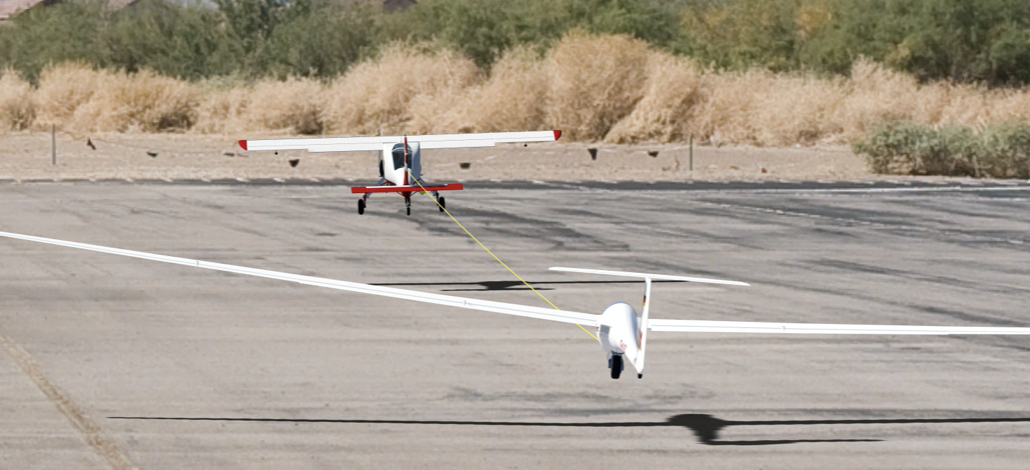
The aeroflyRC add-on contains two autonomously flying tow planes: the cult tow model Wilga and a Beaver. Almost all gliders can be towed solo with them.
2. Towing Procedure
First, load a scene such as Aspach. In this scene, the tow plane takes off from the grass, and as a pilot, you are perfectly positioned behind the tow plane! As a glider, load the DG808c with a 5 m wingspan, for example, and check whether the USB controller or the RC transmitter is controlling the glider correctly.
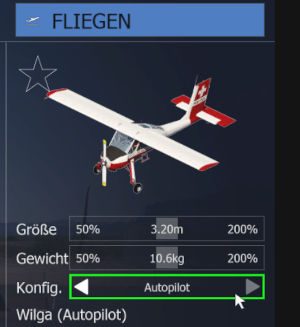 Now you need to load the Wilga via the QuickStart menu (right-click) and “Models” using “Load Model Player 2.” First, however, only select the Wilga, because the next click must be under the preview image on the special towing function as “Configuration”/”Autopilot.”
Then the team will be on the field. Turn off the potentially annoying image split in aeroflyRC by selecting “View” and “Image Split” to “none.”
The simulator’s “camera” always follows the model loaded first. Of course, you can also load the tug first. But don’t be surprised if the camera continues to follow the Wilga after releasing…
If the models are on the hard track and not on the grass track, or if they are incorrectly arranged, you must change the starting position by repeatedly pressing the TAB key or the “V” key. The models line up again with each keystroke until the desired arrangement of the models on the track is achieved.
The actual towing process is now started with the TAB key. After a few seconds, the Wilga rolls forward slowly and tensions the cable, then pulls briefly a few times. After the third or fourth “tug,” the Wilga accelerates to full throttle and takes off.
Choosing a grass track is perfect for your first attempts with the add-on, as the building cable tension rarely causes any rocking in the towed system. Gliders with wheels on a track may roll too far forward when pulling.
To end the towing process, you should first assign the “Hook” function to a switch on the transmitter in aeroflyRC. From now on, the glider flies independently.
Meanwhile, the Wilga will complete its circuits autonomously until the towing system is returned to the starting position with “TAB.”
Have fun with this great add-on!