Flying with a FrSky on aeroflyRC:
You have different possibilities to connect a FrSky radio to the aeroflyRC. You can use the DSC trainer plug for a wired connection to the PC or you can use one of your FrSky receiver for wireless flying. Further down on this page you`ll find infos about the basic settings in the FrSky radio menu.
Option #1: Flying via the trainer plug
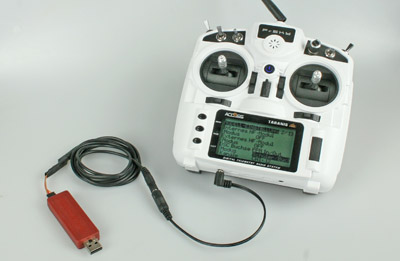 With the interface set #3031037 you can connect your FrSky radio to the aerofly via the DSC trainer plug. The advantages of this solution are:
- The HF module is off. You`ll fly directly via the trainer plug.
- You can use up to 12 channels for many special functions.
- The set includes the USB interface and all required adapters. You only have to activate the trainer mode in the menu.
Option #2: Single channel mode up to 8 channels
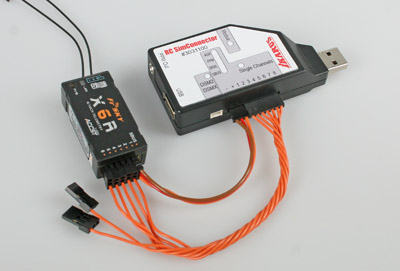 You can connect any 2.4 GHz receiver with at least 4 channels to the IKARUS RC SimConnector in the single channel mode. Also one of your FrSky receivers
- This solution transmits between 4 and max. 8 channels.
- With 4 channels you can already fly throttle, elevator, rudder, aileron and all powered models, gliders, jets, helicopters and drones.
- You only have to bind a receiver to your radio and connect like shown on the image.
Option #3: S.Bus connection up to 16 Kanäle
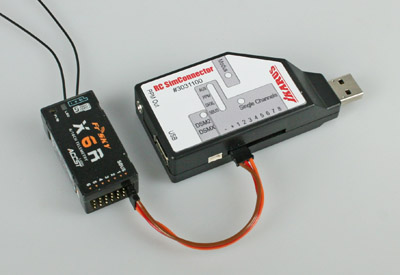 If you have a FrSky receiver with activated S.Bus output you can use more than 8 channels in the simulator with the RC SimConnector #3031100.
- You have to set the S.BUS mode on the RC SimConnector and connect the receiver with the included patch cable according to the image.
- With some FrSky receivers you have to activate the S.Bus mode via a jumper. In the transmitter you should assign or activate all channels you want to use in the aeroflyRC before calibration.
1.Basic settings on the FrSky Taranis
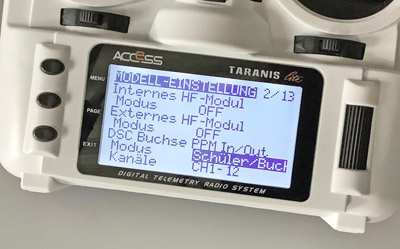 Open the model menu and create a new model memory. Assign a name like “aeroflyRC”.
- Select as model type “Plane”, even if you want to fly glider or helicopter.
- Select CH1 for the throttle function even if you want to fly a glider in the aeroflyRC.
- Also select “1 Channel” for special functions like flaps, because the simulator needs only 1 output channel per function.
- Setting up the tail also select 1 servo channel each for elevator and rudder.
- If you want to control more than the 4 basic functions open the “Inputs” menu and define a switch for the functions “05”, “06” etc. via “Source”. Check in the “Channel Monitor” that alle channels are going out. You can see this via moving bars at the display.
- Connect the transmitter to the PC according to option #1, #2 or #3 on this page. Now launch the aeroflyRC and start the calibration of the transmitter as described below.
2. Basic settings on the FrSky Horus
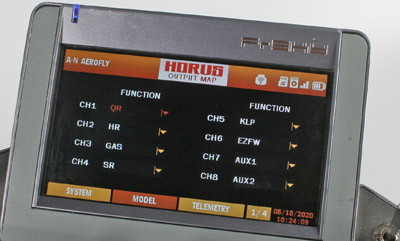 Open the model menu and create a new model memory. Assign a name like “aeroflyRC”
- Select as type “Airplane”and set the radio status via “INTERNAL RF” on “ON”
- If you are using a new receiver, start the binding process by setting the “STATE” to “BIND”.
- Now open the “MONITOR” in the model menu. Per default there are two aileron channels 1 and 5. In the simulator you only need one at the beginning.
- In this case open the “OUTPUT MAP” in the model menu and set e.g. for CH5: “Flaps”, CH6: “Retract”, CH7: “AUX1” and CH8: “AUX2”.
- Finally, assign an encoder (slider or switch) to the previously set functions in the “INPUT MAP”.
- Connect the transmitter to the PC according to option #2 or #3 on this page. Now launch the aeroflyRC and start the calibration of the transmitter as described below
3. Radio calibration in aeroflyRC
With this basic setting you can now continue with the calibration in aeroflyRC. Start the aeroflyRC and click in the main menu under “Controller” on “Search for a new controller”. Afterwards you should get the interface and the detected channel number reported and follow the further instructions for calibration. If you have any issues, please follow this interface test. You will then find all details on the professional setting menu in the aeroflyRC manuals.


