This page is thanks to aerofly forum moderator A. Schönknecht and J. Hanuschik from Aerofly-Sim.de, who did the great job to create different tutorials about user models. To create user models, you need advanced PC skills as well as a lot of fun and a confident handling of file types and datas. This page presents all tutorials and explains the individual steps.
1. Converting a 3D model for the aeroflyRC8
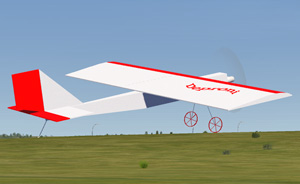 If you already have a 3D model in *.mqo format made with the 3D modelling software Metasequoia, this tutorial by A. Schönknecht provides you with all the tools and a PDF instructions to convert the 3D data to an aeroflyRC8 model. The ZIP also contains the 3D demo data of the demo model “my_aircraft” for a first conversion test. All steps are explained in the PDF manual very detailed.
- Download and unzip the ZIP.
- In the subfolder “Tools” you`ll find the Installer “aerofly_rc_8_content_converter_x64_installer_2020-01-02.exe” for the 3D data converter (Win 8/10).
- Follow the manual: “How to create an aerofly RC 8 user model.pdf”.
- The “Templates” folder contains sample datas of a demo model named “my_aircraft”in order to test the conversion process.
[download url=”[download url=”/downloads/aerofly_tutorial_3dmodel_to_rc8_part1.zip”]
2. Convertible 3D sample model datas for the aeroflyRC8
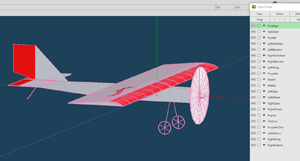
If you want to create your own 3D model in Metasequoia, you should take a look at the sample file “my_aircraft.mqo” included in the ZIP file. The demo model contains all the specifications for a 3D model.
The individual parts and especially their names are important for a successful conversion.
3. Video tutorial for creating a 3D model in Metasequoia
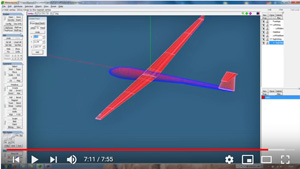 J. Hanuschik from Aerofly-Sim.de has already published a detailed video tutorial on YouTube for the aerofly5 about creating a model in Metasequoia. (In German language)
For an aeroflyRC8 model you only need the first 4 videos. After that you can convert the data according to 1.) on this page.
Change to the tutorial on YouTube
4. Setting up the tmd file for an aeroflyRC8 model
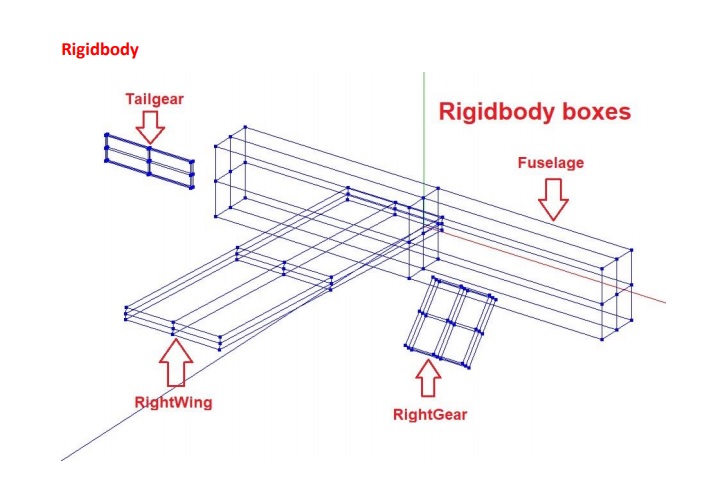 This tutorial is made for anyone who is able to create a 3D model with the 3D modelling software “Metasequoia”. The tutorial explains how to enter the most important values for the elements rigidbody, aerofuselage, aerowing, rotatingbodygraphics and hingedbodygraphics into the *.tmd file.
- Download the Manual and Tools Tutorial #2 as a ZIP
- Unpack the ZIP. The PDF “Values for the tmd File” shows all further steps very detailed.
[download url=”[download url=”/downloads/aerofly_usermodel_tutorial_2.zip”]
5. Creating a model preview image for the aeroflyRC8
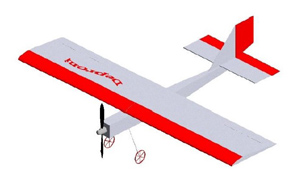
This tutorial by A. Schönknecht explains how to create a preview image. In the minimum case, a *.png with 1024 x 1024 pixels is needed, placed in the conversion folder. If you want to use the exact perspective, follow this tutorial to create a *.png with the aerofly perspective. The tutorial shows the menu navigation of MetaseqioaV3, from versionV4 the rendering is reserved for the paid Expert version.
Download: aerofly_tutorial_preview_usermodel_rc8.pdf
6. Texture a 3D-Objekte with a image
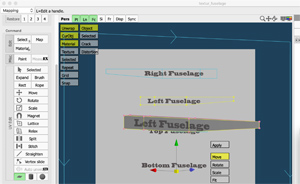
In the beginning, you should assign monocolor materials to all 3D objects such as the fuselage, wing or rudder flaps in order to skip the topic of mapping and textures. However, if you want to show different designs on the left and right side of the hull, this tutorial describes the procedure in MetaseqioaV4.
Because the “mapping” requires some routine in the process, in addition to the PDF tutorial there is also a file with a 3D fuselage object and another with a texture image in the ZIP.
Download: aerofly_tutorial_texture_rc8.zip
7. Object texture for Texturen für advanced user
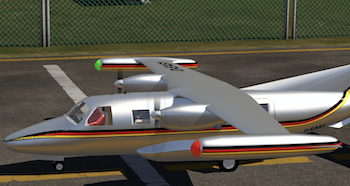 Designing an object such as a fuselage in one colour is the first, simple and also best option.
Later on you can create surfaces with a gloss effects, transparencies or even special colours. This tutorial by A. Schönknecht shows this special topic:
Download Part1: aerofly_tutorial_painting_models_part1_rc8.pdf
Download Part2: aerofly_tutorial_painting_models_part2_rc8.pdf
8. Creating a retractable landing gear for an RC8 user model
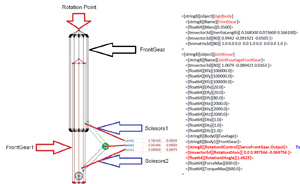
This tutorial shows the interaction between the 3D model and the tmd file in the model folder. The aerofly reads out all model-specific parameters loading a model.
By this a retractable landing gear must be created with the correct 3D object names in the 3D file and then entered in the same way as a geometry object with the axes in the tmd file. Author: A. Schönknecht
Download: aerofly_tutorial_rectractable_usermodel_rc8.pdf
9. Special model functions in the tmd file
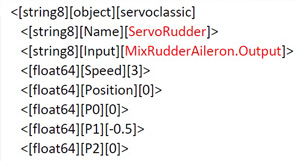 If you create your own model for the aeroflyRC8, you have to edit the tmd file. It is also “only” a simple text edit, but working cleanly is important! In the following PDFs A. Schönknecht shows several special features via the tmd file.
Example 1: Mixer Rudder and Aileron
Download: aerofly_tutorial_mixer_rudder_aileron_rc8.pdf
Example 2: Switchable mixer “Rudder to engine”, to improve manoeuvring on the water with a twin engine. The mixer can also be switched via the “Aux-1” channel.
Downlaod: aerofly_tutorial_mixer_rudder_engine_rc8.pdf
Example 3: Servo linkage. Servos, linkages and control horns are not needed in the simulator, but if you create them in the 3D drawing and “activate” them you´ll have a visual highlight.
Downlaod: aerofly_tutorial_linkagegraphics_rc8.pdf
Example 4: Reverse thrust. A few more lines to edit here, but anyone who wants to fly with reverse thrust will find the solution right here!
Download: aerofly_tutorial_reverse_thrust_rc8.pdf
Example 5: Folding prop. It`s getting more complex, but the procedure remains. The interaction of 3D elements and the TMD also enables a folding prop!
Download: aerofly_tutorial_folding propeller_rc8.pdf
Example 6: Air resistance of a retract. This PDF explains how to enter an “air brake” for the extended state of the landing gear in the tmd file.
Download: aerofly_tutorial_airbrake_retractable_rc8.pdf
Example 7: Gear doors. The demands increase, the principle remains! In this PDF the landing gear doors, which were created as separate objects in the 3D drawing, are made operable. The focus is once again on the function itself and the rotary axes.
Download: aerofly_tutorial_geardoors_rc8.pdf
Example 8: Opening cockpit canopy and boarding ladder. The author has shown with his RC8 model of the A-10 that “everything” is possible. In this PDF you`ll find the lines about.
Download: aerofly_tutorial_geardoors_rc8.pdf
10.Converting a RC7 user model to the RC8
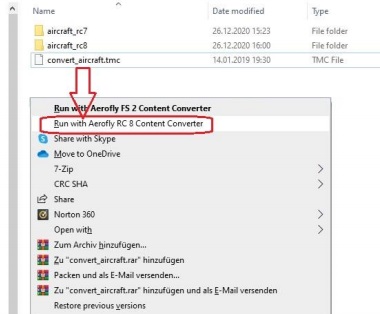 Download the manual and tools Tutorial #1 as a ZIP below.
- Unpack the ZIP. The PDF shows the exact instruction for all further steps!
- Install the tool contained in the ZIP according to the instructions: “aerofly_RC8_content_converter”.
- Now safe the files of an RC7 user model in the folder “aircraft_RC7” in the same way as shown with the example datas “Baron”.
- Launch the conversion process with a right click on the file “convert_aircraft.tmc” and “Run with Aerofly RC8 Content Converter”.
- The conversion process begins, the new data for the RC8 are stored in the destination folder “aircraft_RC8”. A tm.log file logs the process and error.
For all further details please refer to the PDF “How to convert a model from RC7 to RC8”.
[download url=”[download url=”/downloads/aerofly_usermodel_tutorial_1.zip”]


